Web Programming
Lecture 13
Testing & Integration in Web Applications

June 4, 2025
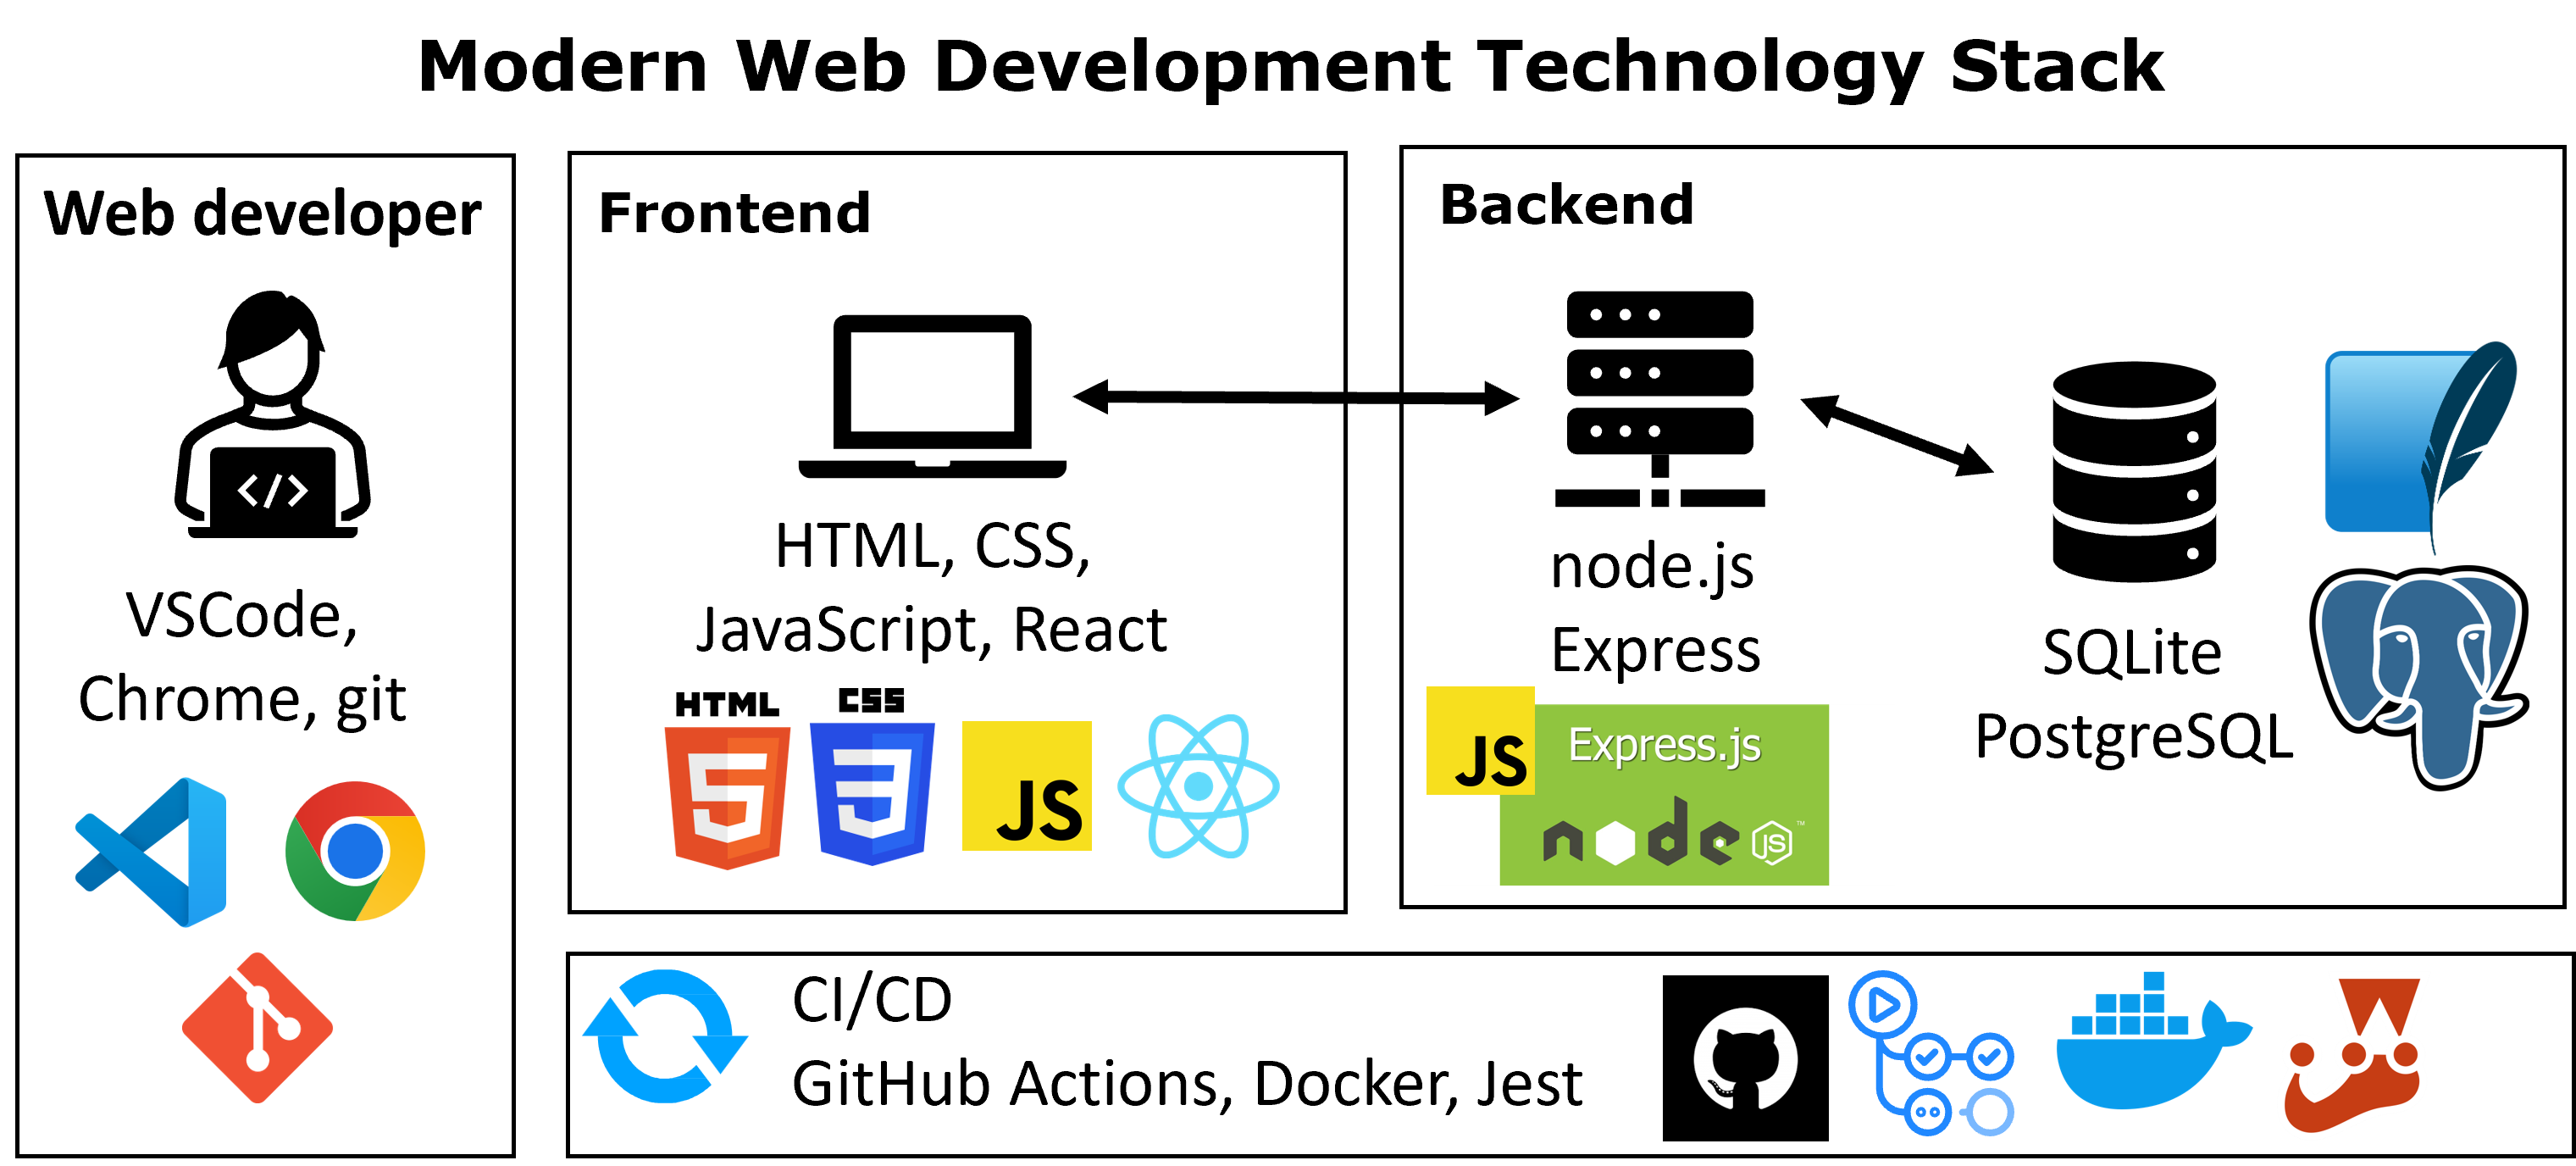
Course structure
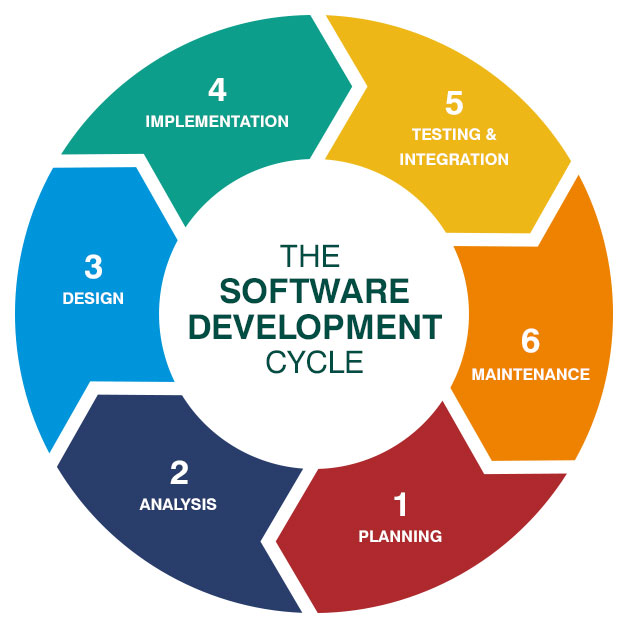
Software Development Life Cycle (SDLC)
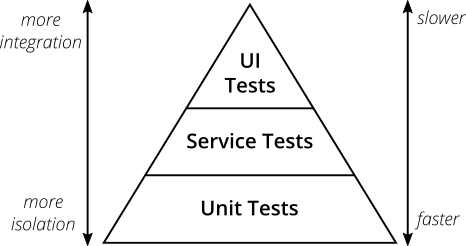
The test pyramid
- Unit Tests
- Test individual components in isolation.
- Fast, precise, and cost-effective.
- Written and maintained by developers.
- Service Tests
- Test application logic and services independent of the UI.
- Here you test your REST API endpoints, database queries or service functions.
- More stable and efficient than UI tests.
- UI Tests
- Test the system through the user interface.
- Slow, fragile, and costly to maintain.
- Used only for critical user workflows.
Running the test suites
- Now, you can run the tests with the following command:
npm run node-test - You will see the following output:
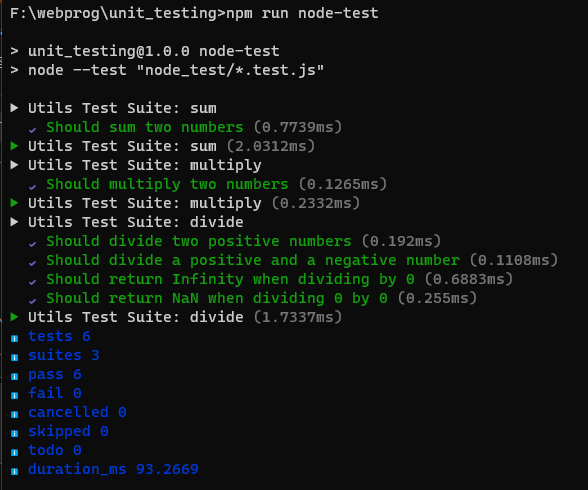
- Notice that the terminal uses distinct colors to show us the results of the tests.
- 3 test suites passed
- Experiment yourself by making some tests fail and see how does the output change.
Using Jest library
- Jest is a JavaScript testing framework that is very popular in the JavaScript community.
- It’s very easy to use and has a lot of features that will help us to build and maintain our test suite
- Specially for frontend development using modern frameworks, such as Angular, React, or Vue.
- In practice, it is better to only use one library.
- The first step is to install Jest in our project as a development dependency.

Running the Jest test suites
- Now, you can run the tests with the following command:
npm run jest-test - You will see the following output:
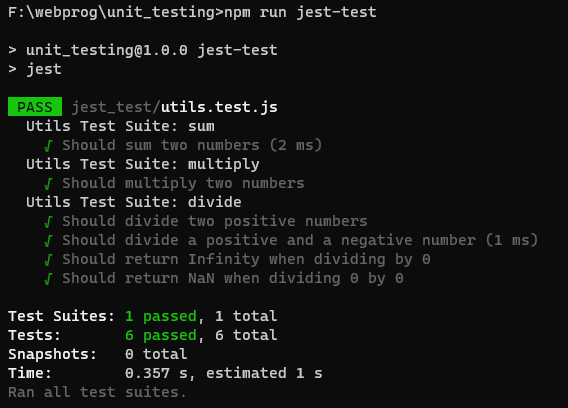
- The output is very similar to the output that we saw with the Node.js core library
- Again, experiment yourself by making some tests fail and see how does the output change.
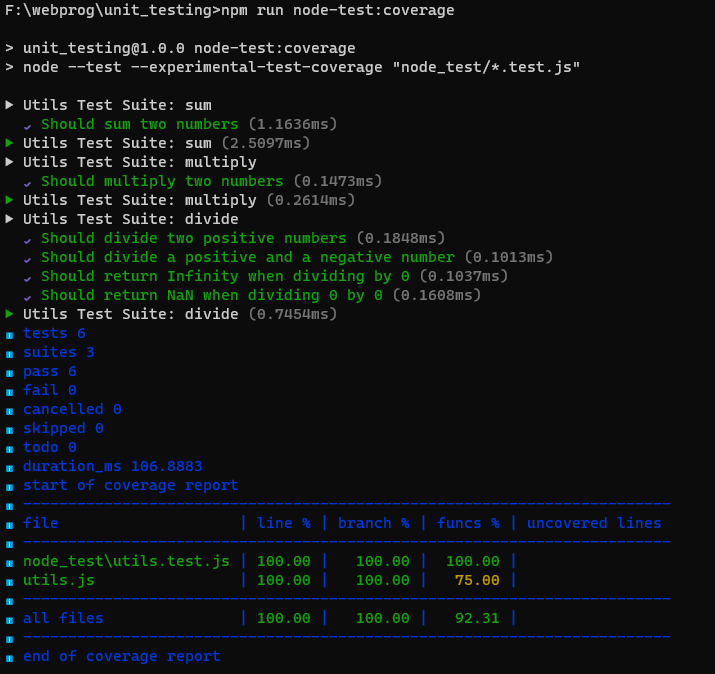
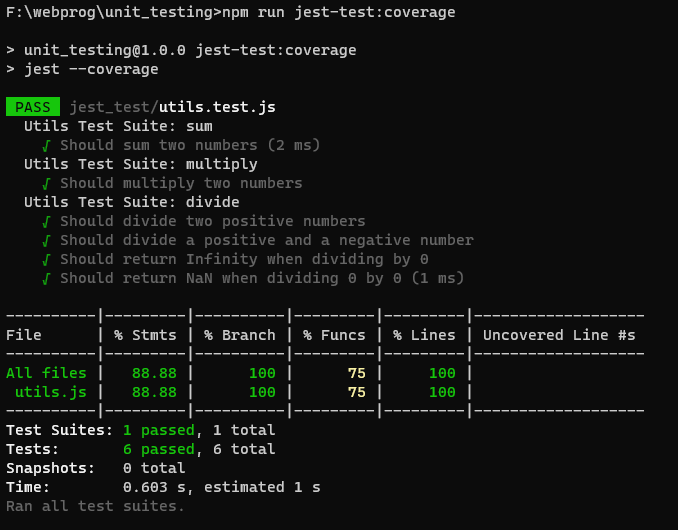
Running the tests
- Let’s run the code coverage for both Node.js and Jest to see the results.
npm run node-test:coverageandnpm run jest-test:coverage- We have 75% code coverage for the functions, as we don’t have any coverage for the
subtractfunction.
Node.js
Jest
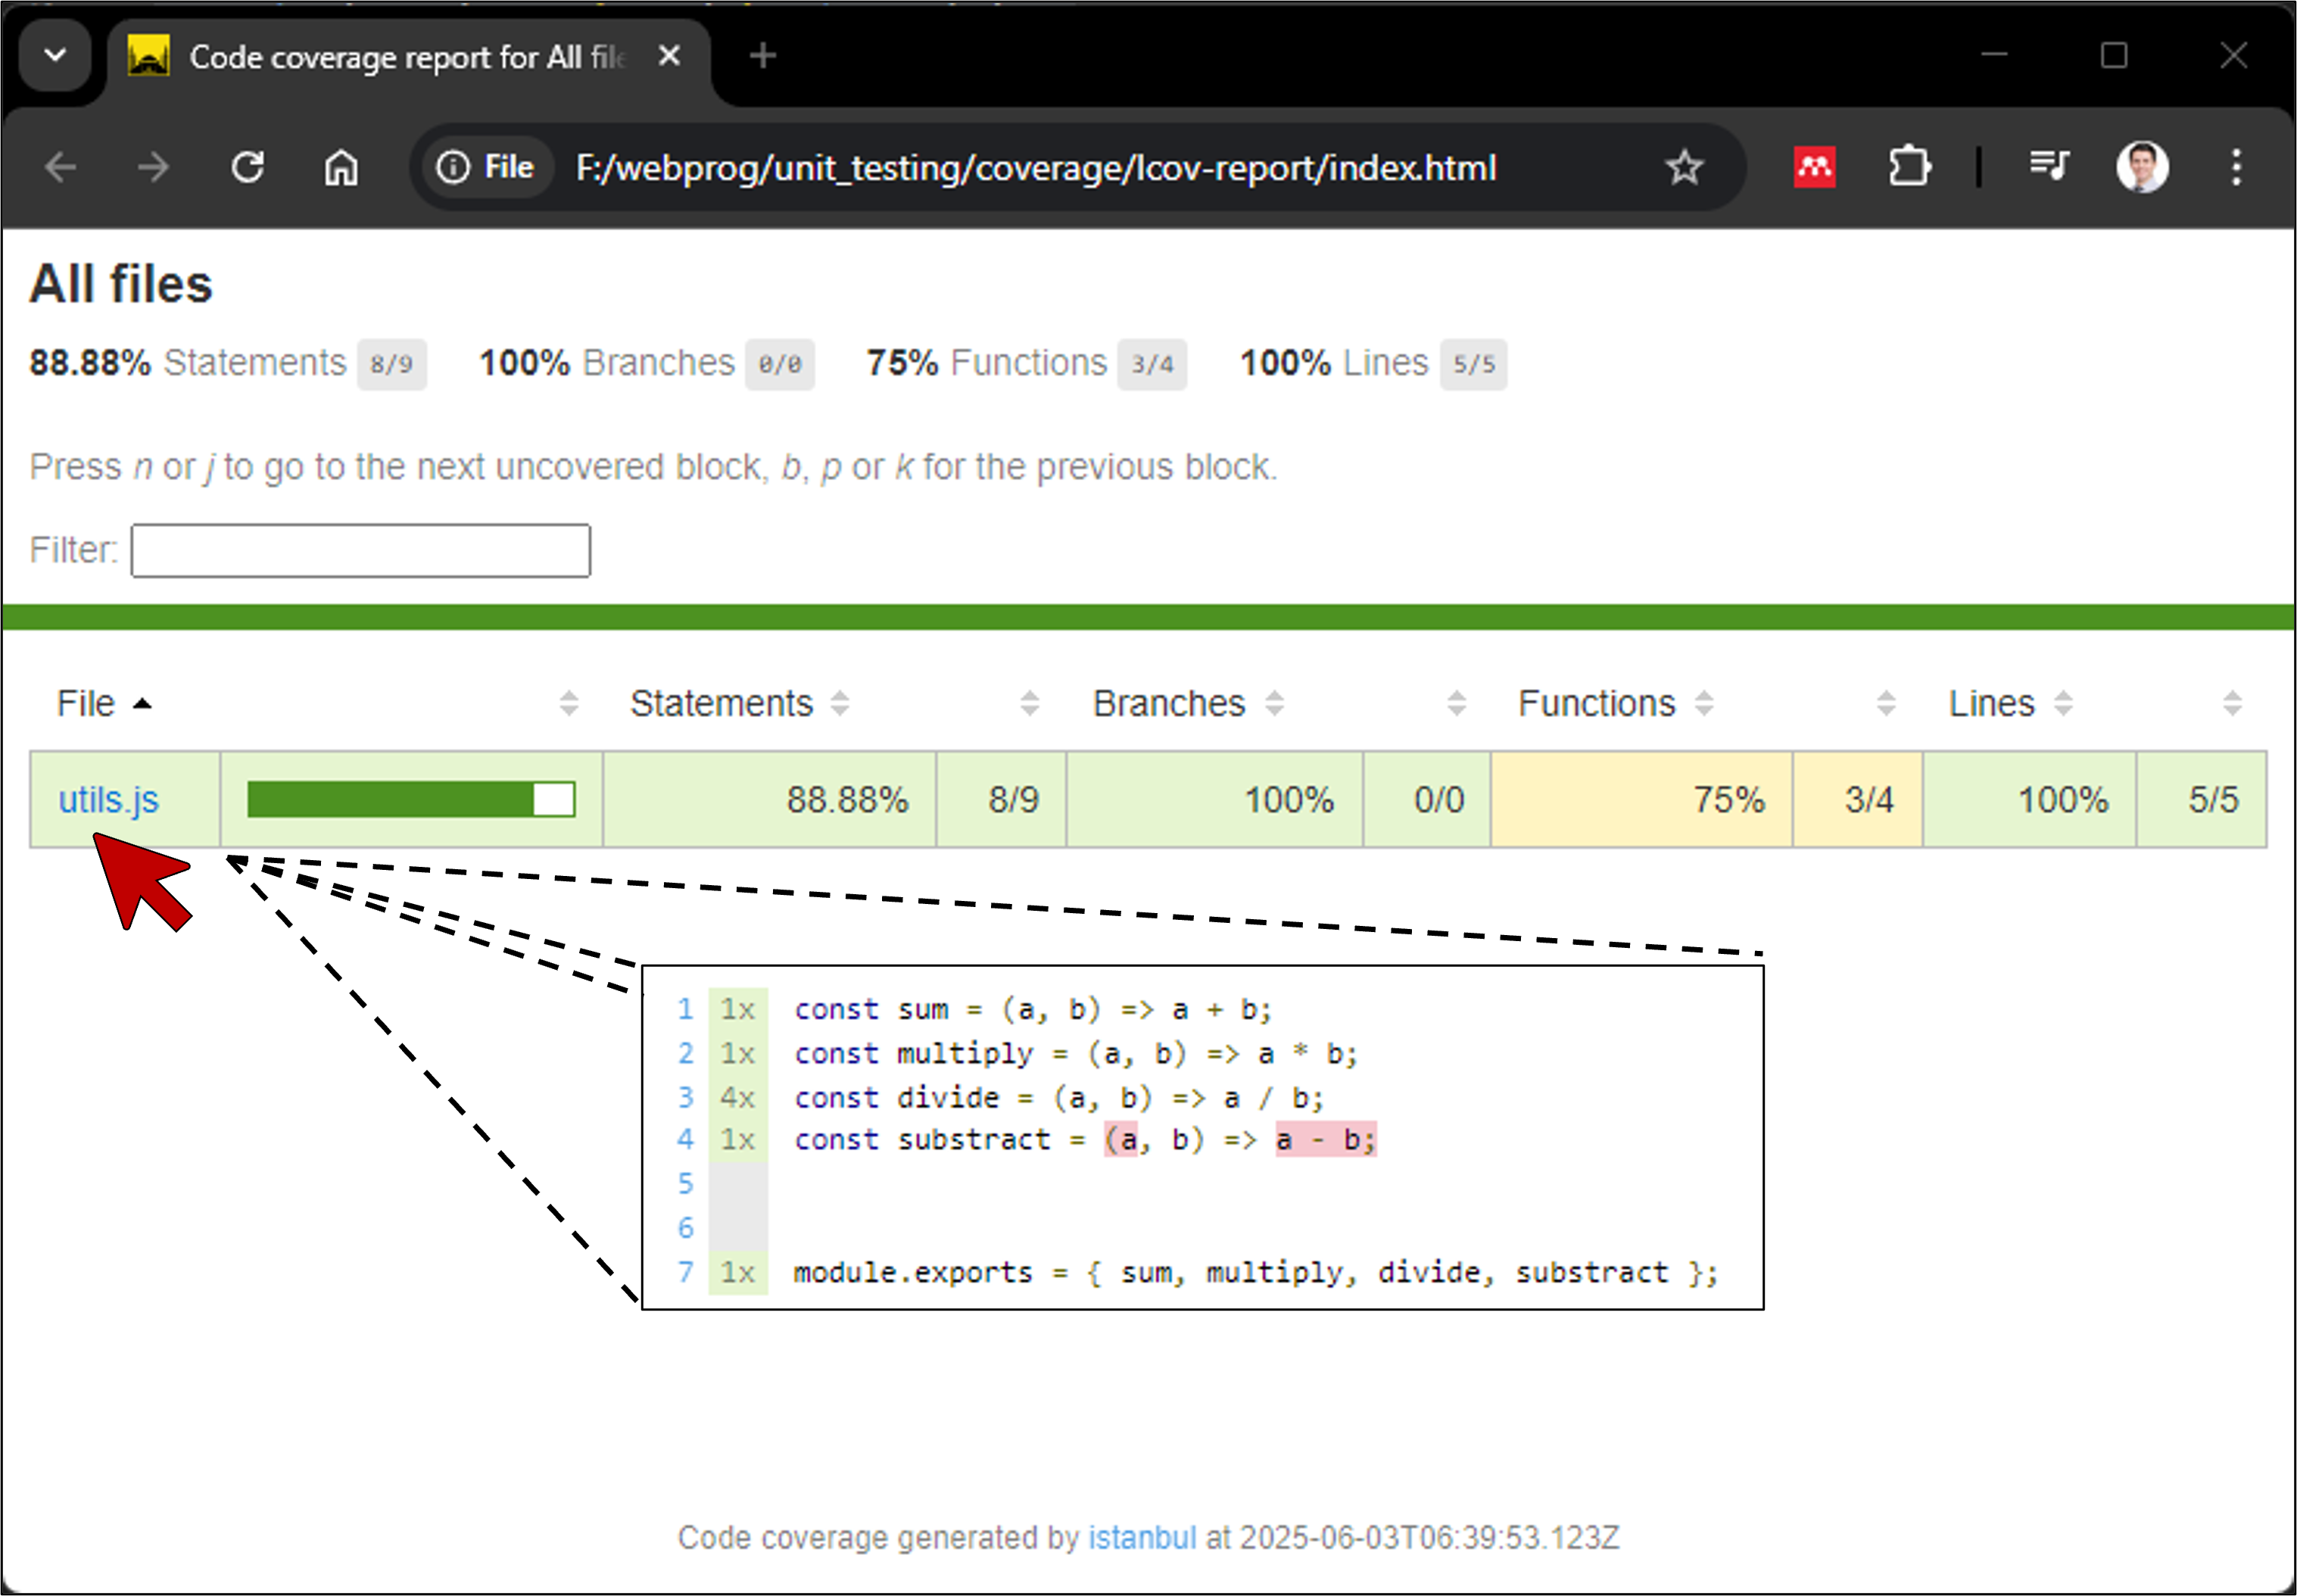
Coverage UI report
- In both cases, we have generated a coverage folder with the results.
- We can open the
index.htmlfile located incoverage/lcov-reportin our browser to see the results. - We can explore in detail what is and is not covered in
utils.js - The code coverage report is a great way to understand your tests, especially when you are working with a large code base.
The test pyramid (Service Tests)
- Unit Tests
- Test individual components in isolation.
- Fast, precise, and cost-effective.
- Written and maintained by developers.
- Service Tests
- Test application logic and services independent of the UI.
- Here you test your REST API endpoints, database queries or service functions.
- More stable and efficient than UI tests.
- UI Tests
- Test the system through the user interface.
- Slow, fragile, and costly to maintain.
- Used only for critical user workflows.
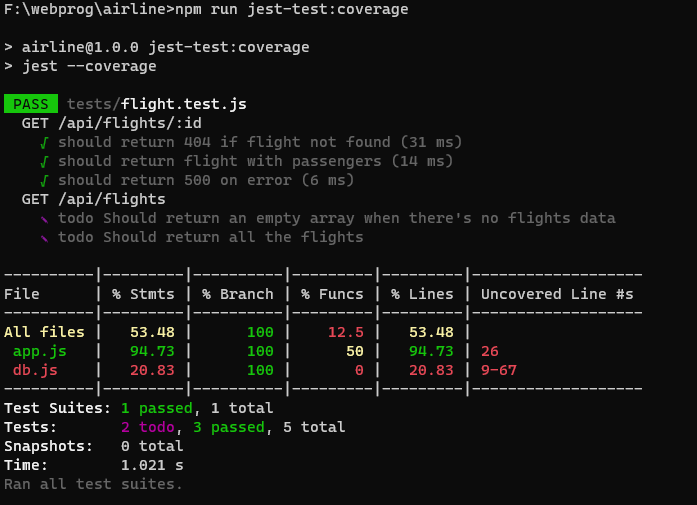
Running the API tests
- Let’s run the tests with code coverage for Jest to see the results.
npm run jest-test:coverage
- There are 2 todo tests (
/api/flights/) app.jshas 50% of coverage (app.usefunctions were not tested)db.jshas 0% of coverage- This requires to setup a development database that has the same schema as the production database
- This is important for integration tests
The test pyramid (UI Tests)
- Unit Tests
- Test individual components in isolation.
- Fast, precise, and cost-effective.
- Written and maintained by developers.
- Service Tests
- Test application logic and services independent of the UI.
- Here you test your REST API endpoints, database queries or service functions.
- More stable and efficient than UI tests.
- UI Tests
- Test the system through the user interface.
- Slow, fragile, and costly to maintain.
- Used only for critical user workflows.
UI/Client-side testing
- Client-side testing verifies that all interactive elements of the user interface (UI) work as intended.
- This includes buttons, forms, links, and dynamic content.
- Ensures that users can interact with the application as expected, preventing issues like broken buttons, non-responsive forms, and other interaction problems.
- It enhances user experience, identify browser-specific issues and validate client-side logic

Technologies for Client-Side Testing
- Selenium: A widely-used open-source tool for automating web browsers.
- It allows you to write scripts in various programming languages (such as Python, Java, and JavaScript) to simulate user interactions with web applications.
- Ideal for end-to-end testing of web applications, verifying that the application works as expected in a real browser environment.

CI/CD
- Stands for Continuous Integration and Continuous Delivery or Deployment
- It aims to streamline and accelerate the software development lifecycle
- CI refers to the practice of automatically and frequently integrating code changes into a shared source code repository
- Frequent merges to main branch
- Automated unit testing
- CD is a 2-part process that refers to the integration, testing, and delivery of code changes Short release cycles

Technologies for CI/CD
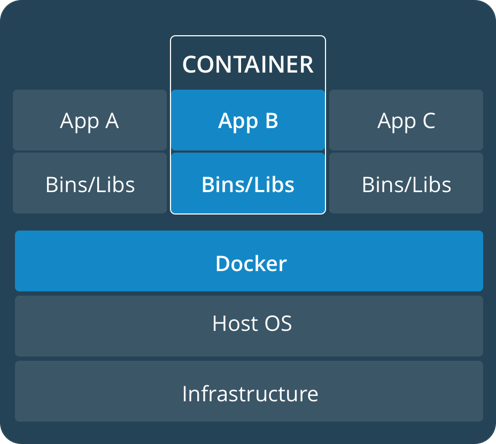
Docker
- Platform that uses containerization to create, deploy, and run applications in isolated environments, ensuring consistency across multiple development and deployment environments.
- Docker ensures that applications run in the same environment from development to production by encapsulating everything needed to run the software, including the code, runtime, libraries, and dependencies.
- Docker containers are lightweight and share the host system’s kernel, leading to lower overhead compared to traditional virtual machines.
Course wrap-up