sequenceDiagram
    participant C as Client
    participant S as Server

    C->>S: Hello (supported ciphers)
    S-->>C: Hello + Certificate (public key)
    C->>C: Validate certificate
    C->>S: Key exchange (encrypted with server's public key)
    Note over C,S: Shared session key established
    C->>S: Encrypted HTTP request
    S-->>C: Encrypted HTTP response
Web Programming
Lecture 12
Authentication, authorization and security
Josue Obregon 
Seoul National University of Science and Technology
Information Technology Management
Lecture slides index
May 17, 2026
Agenda
- Security in web applications and OWASP vulnerabilities
- HTTP vs HTTPS
- Authentication vs authorization
- Session-based vs token-based authentication
- Password hashing
- JSON Web Tokens (JWT) and OAuth 2.0 overview
- Protected routes with middleware
- Practical session: securing the Flights API
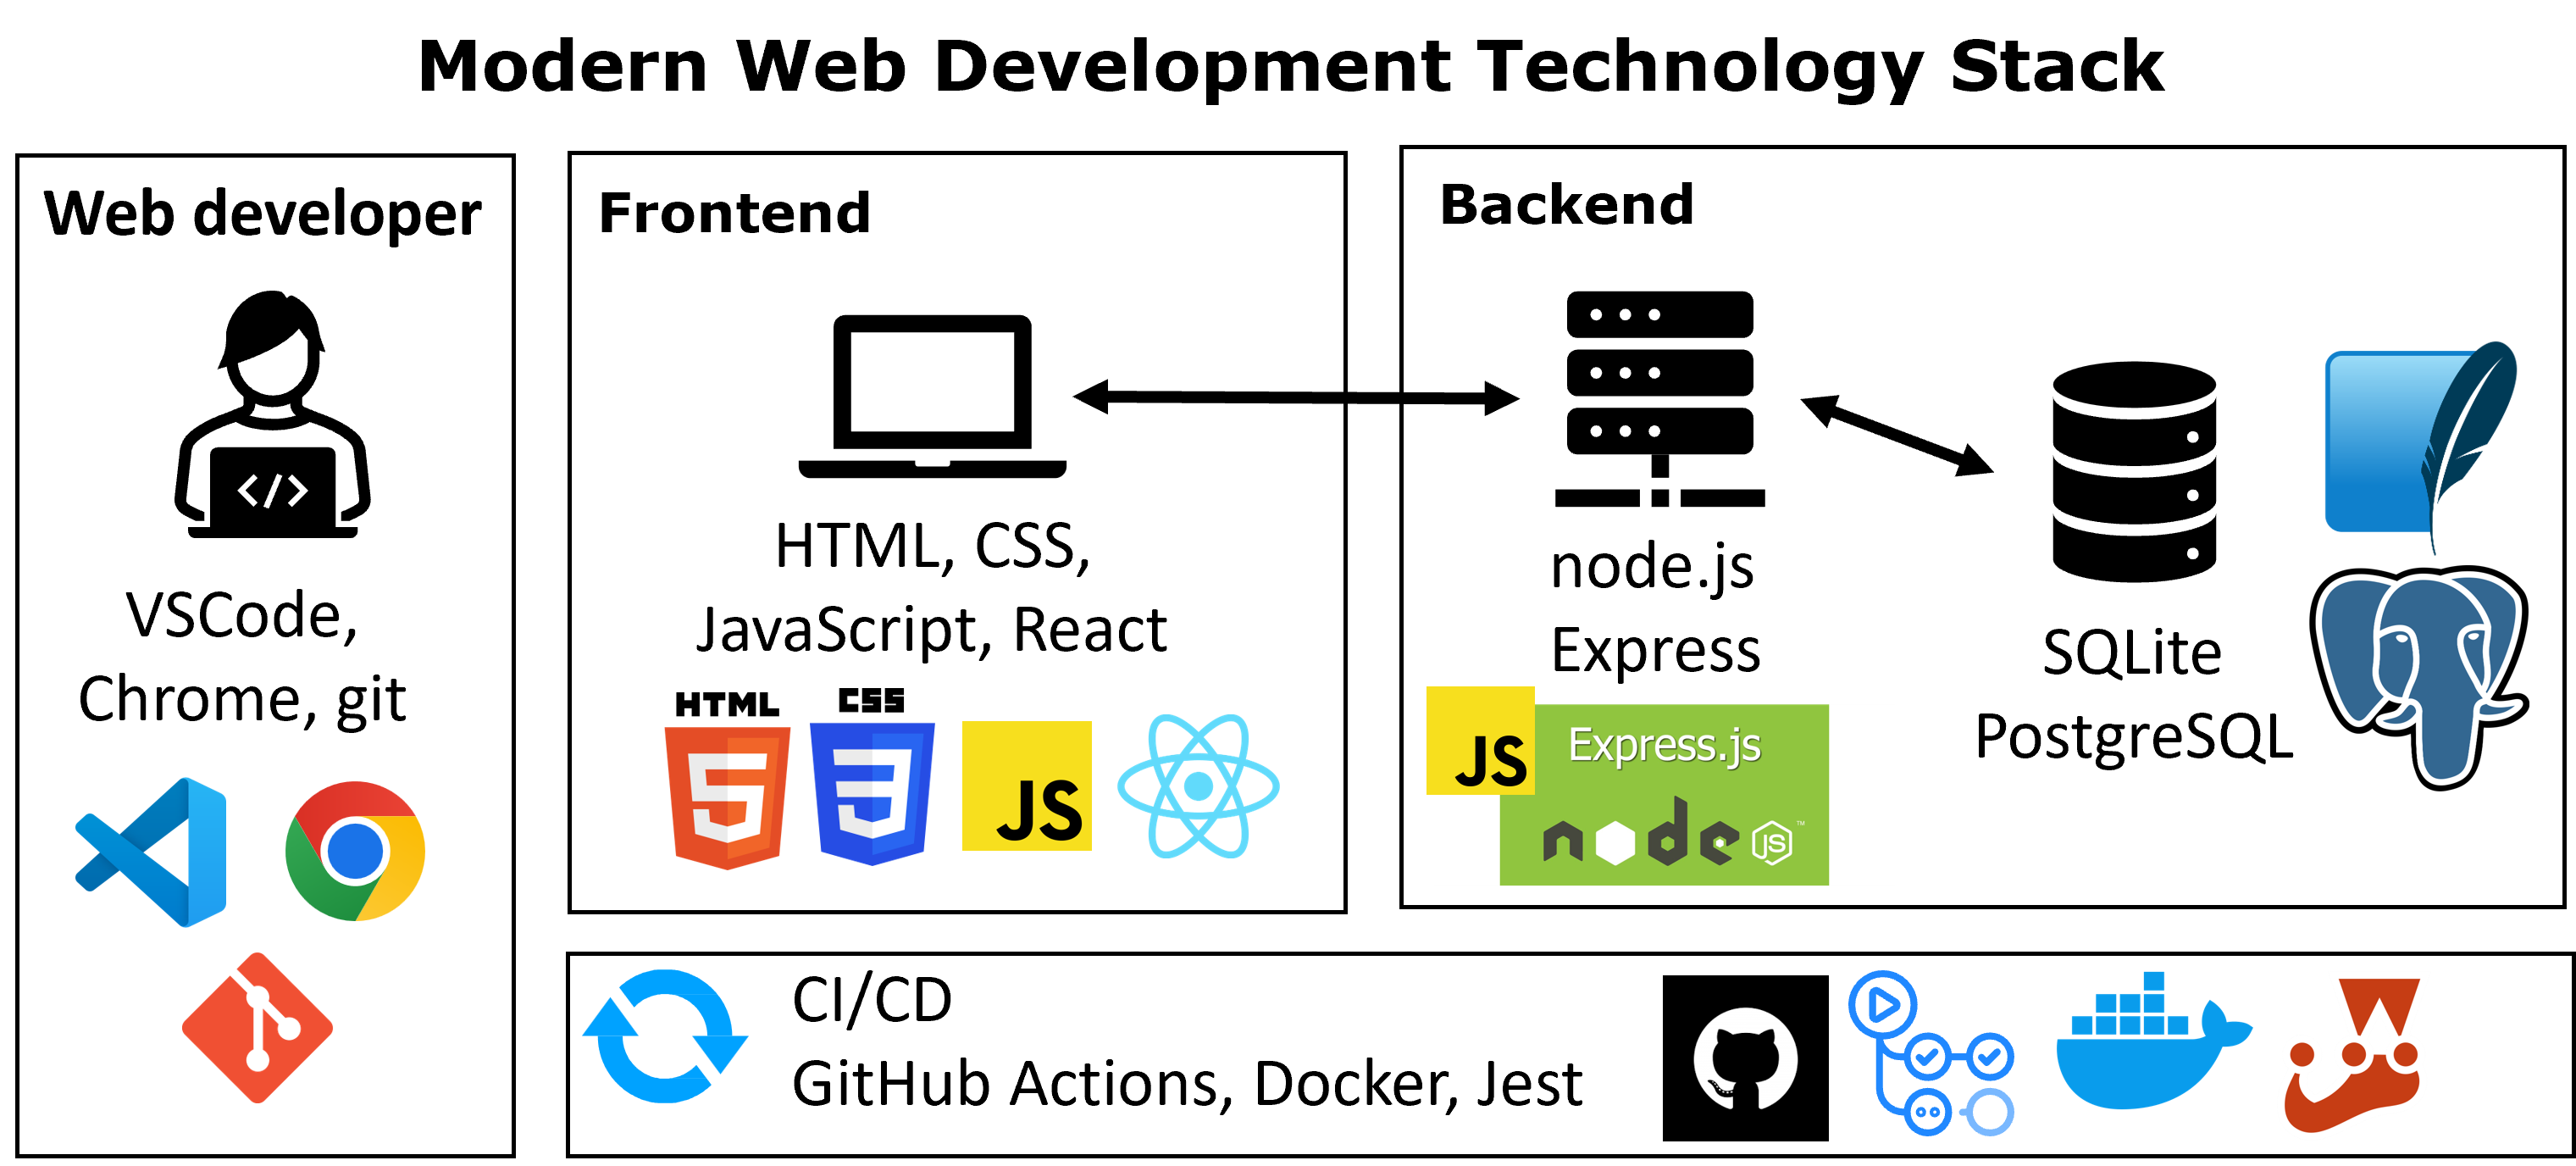
Course structure
The importance of security
- Modern web applications operate under conditions that make security a primary concern:
- Exposed continuously to the public internet
- Handle sensitive business and user data (credentials, payments, personal information)
- Depend on layered architectures and third-party libraries that expand the attack surface
- Developers act as the first line of defense, even in organizations with dedicated security teams.
- Social engineering is currently the most common attack vector: human trust is easier to exploit than well-written code.
- Consequences of insecure systems:
- Data breaches with regulatory and legal implications
- Reputation damage and loss of user trust
- Direct financial impact through fraud or service disruption
Security in web applications and APIs
- APIs concentrate sensitive functionality:
- Expose business logic through endpoints
- Transmit user data, transactions, and authorization decisions
- Attackers target APIs because they are often less protected than user interfaces:
- Weak input validation
- Missing authentication or authorization checks
- Predictable resource identifiers
- The Open Web Application Security Project (OWASP) publishes reference lists of the most critical vulnerabilities:

OWASP top 3 vulnerabilities
- Broken Access Control: users perform actions outside their authorized scope.
- Examples: URL tampering, privilege escalation, insecure direct object references, broken JWT validation
- Related: Cross-Site Request Forgery (CSRF) — a malicious site triggers requests from an authenticated user’s browser without their consent
- Prevention: enforce access checks on the server, deny by default, use anti-CSRF tokens or
SameSitecookies
- Cryptographic Failures: sensitive data is exposed because encryption is missing, weak, or misused.
- Examples: clear-text transmission, weak or deprecated algorithms (MD5, SHA1), poor key management
- Prevention: TLS for data in transit, modern algorithms at rest, secure password hashing (bcrypt, Argon2)
- Injection: untrusted input is passed to an interpreter as part of a command or query.
- SQL injection: user input concatenated into SQL strings allows attackers to alter the query (e.g.,
' OR 1=1 --) - Cross-Site Scripting (XSS): untrusted input rendered into the DOM as HTML allows attackers to inject scripts into other users’ browsers
- Prevention: parameterized queries (placeholders, never string concatenation), escape or sanitize output, use
textContentinstead ofinnerHTMLwhen rendering user data
- SQL injection: user input concatenated into SQL strings allows attackers to alter the query (e.g.,
HTTP vs HTTPS
- HTTP transmits requests and responses in plain text.
- Any intermediary on the network can read or modify the content
- Credentials, tokens, and cookies are exposed to eavesdropping
- HTTPS wraps HTTP traffic in a TLS-encrypted channel.
- Encryption: data in transit cannot be read by intermediaries
- Integrity: tampering with the traffic is detectable
- Authentication: TLS certificates prove the server’s identity
- HTTPS does not protect data once decrypted on the server and does not replace authentication or authorization
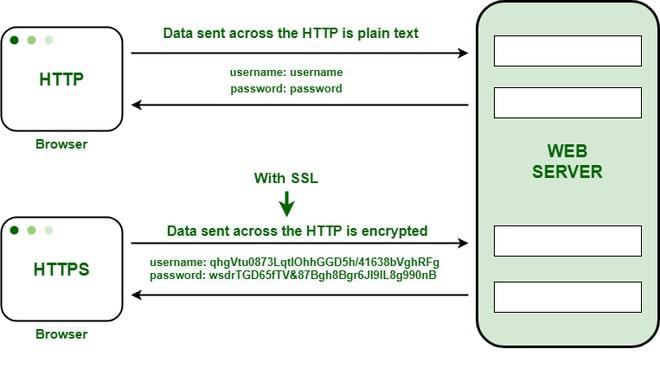
- HTTPS is required for credentials, tokens, and any sensitive payload
- Modern browsers flag plain HTTP sites as insecure
- Certificates can be obtained at no cost (e.g., Let’s Encrypt)
TLS handshake
- The handshake establishes a secure channel before any HTTP message is exchanged. It achieves three goals:
- Authentication: the server proves its identity with a certificate signed by a trusted Certificate Authority
- Key agreement: client and server derive a shared symmetric session key
- Integrity: subsequent traffic is protected against tampering
- Asymmetric cryptography is used only during the handshake to exchange keys safely.
- Application data (HTTP requests and responses) is then encrypted with the symmetric session key, which is significantly faster.
Authentication and authorization
- Authentication verifies who a user is.
- Establishes identity through credentials such as username/password, tokens, or biometrics
- May include Multi-Factor Authentication (MFA) for stronger assurance
- Authorization determines what an authenticated user is allowed to do.
- Based on roles, permissions, or scopes
- Applied independently to each protected resource or action
- Key distinction:
- Authentication: “You are user12345.”
- Authorization: “user12345 can view flights but cannot create new flights.”
- Both must be enforced on the server. Client-side checks improve UX but never guarantee security.

Authentication factors
- Authentication relies on the user presenting an identifier together with a credential.
- The server verifies the binding between identifier and credential, then decides whether to grant access.
- Credentials fall into three categories (factors):
- Something the user knows: password, PIN, security question
- Something the user has: phone, hardware token, smart card
- Something the user is: fingerprint, face, voice (biometrics)
- Multi-Factor Authentication (MFA) combines two or more categories.
- Example: password (knows) plus a one-time code sent to a phone (has)
- Significantly raises the cost of credential theft
- Common authentication mechanisms in web applications:
- Username and password
- Session-based authentication (server-side state)
- Token-based authentication (e.g., JWT), common in RESTful APIs
Authorization and Role-Based Access Control
- Authorization decisions answer questions such as:
- Can this user read this resource?
- Can this user modify or delete this resource?
- Can this user reach this route at all?
- Role-Based Access Control (RBAC) is the most common authorization model:
- Permissions are grouped into roles (e.g.,
admin,editor,viewer) - Users are assigned one or more roles
- Each protected action is allowed or denied based on the user’s roles
- Permissions are grouped into roles (e.g.,
- Implementation principles:
- Apply checks on the server for every protected route and action
- Deny by default, allow only what is explicitly granted
- Validate resource ownership when a user accesses their own data (e.g., a user can only delete their own posts)
- Missing authorization checks are the root cause of Broken Access Control vulnerabilities.
Session-based vs token-based authentication
Session-based
- After login, the server creates a session and stores it (memory, DB, or cache).
- The client receives a session ID, typically in a cookie.
- Each request includes the cookie; the server looks up the session.
- Characteristics:
- State lives on the server
- Easy to invalidate (delete the session)
- Scales poorly across many servers without shared session storage
- Cookies require CSRF protection
Token-based (e.g., JWT)
- After login, the server issues a signed token containing user claims.
- The client stores the token and sends it in the
Authorizationheader on each request. - The server verifies the signature; no session lookup is needed.
- Characteristics:
- Stateless: scales horizontally without shared storage
- Token revocation requires extra mechanisms (blocklists, short expirations)
- Storage in the browser must be chosen carefully (XSS exposure)
- Both approaches are valid. Session-based suits traditional web apps with cookies; token-based suits APIs, mobile clients, and distributed systems.
Password hashing
- Passwords must never be stored in plain text.
- A database breach would immediately expose all user credentials
- Users often reuse passwords across services, amplifying the impact
- Hashing transforms a password into a fixed-length value using a one-way function.
- The original password cannot be recovered from the hash
- On login, the server hashes the submitted password and compares it to the stored hash
- A good password hash function for storage is slow and adaptive:
bcrypt,Argon2,scryptadd a configurable cost factor- Slowness limits brute-force attempts
- General-purpose hashes (MD5, SHA1, SHA256) are not suitable for password storage: they are fast by design.
More on Password hashing
- Salting: a unique random value added to each password before hashing.
- Prevents precomputed (rainbow table) attacks
- Ensures identical passwords produce different hashes
- bcrypt embeds the salt in the resulting string
- The code below shows an example using the npm package
bcrypt, a popular package used for password hashing
JSON Web Tokens (JWT)
- A JWT is a compact, URL-safe string that encodes information (claims) and is signed with a secret or private key.
- Purpose in authentication:
- After successful login, the server issues a JWT to the client
- The client includes the JWT in subsequent requests
- The server verifies the signature to trust the claims, without storing session state
- Properties relevant to API design:
- Stateless: the server does not keep session records, simplifying horizontal scaling
- Self-contained: claims (user id, roles, expiration) travel with the request
- Verifiable: any modification invalidates the signature and is rejected
- Trade-offs:
- Tokens cannot be revoked instantly without additional mechanisms
- Sensitive data should not be placed in the payload — it is encoded, not encrypted

JWT structure
- A JWT is composed of three parts separated by dots, each base64url-encoded:
- Header: token type and signing algorithm
- Payload: claims describing the subject and metadata
- Common claims:
iss(issuer),sub(subject),exp(expiration),nbf(not before),iat(issued at),jti(token id) - Custom claims: user id, roles, scopes
- Common claims:
- Signature: produced by signing the encoded header and payload with the secret or private key
- Verification:
- The server recomputes the signature and compares it to the one in the token
- A valid signature proves the token was issued by a trusted party and has not been altered
- The payload is readable by anyone holding the token. It must not contain secrets.
Header
Payload
Encoded token
JWT authentication flow
- Login phase:
- The client submits credentials over HTTPS
- The server validates them and signs a JWT containing the user’s identity and roles
- The token is returned to the client
- Authenticated requests:
- The client sends the token in the
Authorization: Bearer <token>header - The server verifies the signature and expiration
- On success, the request proceeds; on failure, the server responds with
401 Unauthorized
- The client sends the token in the
- The server never stores the token; trust comes from the signature.
sequenceDiagram
    participant Client
    participant Server

    Client->>Server: POST /login (credentials)
    Server->>Server: Verify credentials
    Server->>Server: Sign JWT
    Server-->>Client: 200 OK + JWT
    Client->>Server: GET /protected (Bearer JWT)
    Server->>Server: Verify signature & expiry
    Server-->>Client: 200 OK + resource
OAuth 2.0 — delegated authorization
- OAuth 2.0 is an authorization framework that lets a user grant a third-party application limited access to their data without sharing credentials.
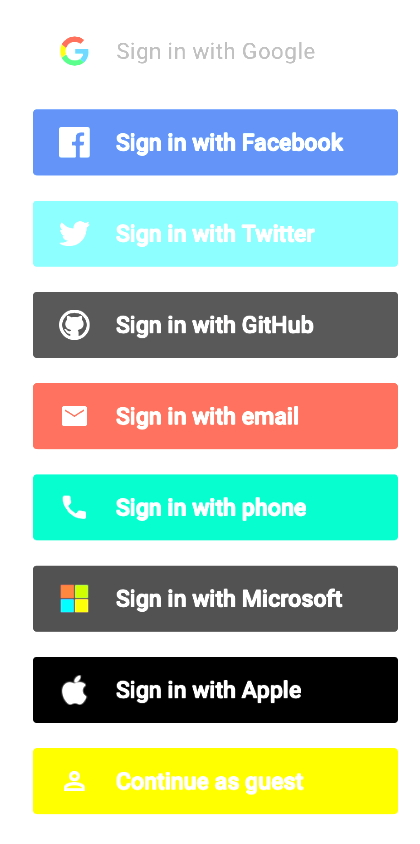
- Used by major providers (Google, Meta, GitHub) to implement “Sign in with…” and API access flows.
- Roles in OAuth 2.0:
- Resource Owner: the user who owns the data
- Client: the application requesting access on the user’s behalf
- Authorization Server: authenticates the user and issues access tokens
- Resource Server: hosts the protected data and validates access tokens
- The client receives an access token with a defined scope and expiration; the user’s password is never exposed to the client.
- OAuth is often paired with OpenID Connect to add an authentication layer on top of authorization.
Protected routes and middleware
- A protected route requires the requester to be authenticated (and possibly authorized) before the route handler executes.
- In Express, this is implemented with middleware placed before the route handler:
- The middleware inspects the request (headers, cookies)
- It validates the credential (e.g., verifies a JWT)
- On success, it attaches user information to the request and calls
next() - On failure, it short-circuits the pipeline with
401 Unauthorizedor403 Forbidden
- Authentication vs authorization in the pipeline:
- Authentication middleware: confirms identity (valid token)
- Authorization middleware: confirms permission for the specific action (e.g., role check, ownership check)
- Status code convention:
401 Unauthorized: missing or invalid credentials403 Forbidden: authenticated, but not allowed to perform the action
From theory to practice: securing the Flights API
Goal: extend the Flights API to authenticate users and protect write operations.
- Starting point: the Flights API from Lecture 11
- Routes, controllers, models, SQLite database (
flights,passengers) - Frontend pages in
public/: search, detail, add, manage - Public endpoints, no authentication
- Routes, controllers, models, SQLite database (
- Additions in this session:
userstable for account storage with hashed passwordsmodels/usersModel.jsmodel for accessing theuserstableroutes/auth.js+controllers/authController.jsforPOST /registerandPOST /loginmiddleware/authMiddleware.jsto verify JWTsPOST /flightsandDELETE /flights/:idmade protected- New frontend pages:
register.html,login.html - Updated
add.jsandmanage.jsto send the token, plus a smallauth.jshelper
Project structure
Before
flights-api/
├── app.js
├── db.js
├── flights.db
├── openapi.yaml
├── routes/
│   └── flights.js
├── controllers/
│   └── flightsController.js
├── models/
│   ├── flightsModel.js
│   └── passengersModel.js
└── public/
    ├── index.html / index.js
    ├── flight.html / flight.js
    ├── add.html / add.js
    ├── manage.html / manage.js
    └── styles.css
After
flights-api/
├── app.js                          (updated)
├── db.js                           (updated: + users table)
├── routes/
│   ├── flights.js                  (updated)
│   └── auth.js                     (new)
├── controllers/
│   ├── flightsController.js
│   └── authController.js           (new)
├── middleware/
│   └── authMiddleware.js           (new)
└── public/
    ├── register.html / register.js (new)
    ├── login.html / login.js       (new)
    ├── auth.js                     (new, shared helper)
    ├── add.html / add.js           (updated)
    ├── manage.html / manage.js     (updated)
    └── ...
Installing dependencies
- Package roles:
bcrypt: password hashing and verificationjsonwebtoken: signing and verifying JWTsdotenv: loads configuration values from a.envfile intoprocess.env
- Why
dotenv:- The JWT signing secret must never live inside the source code
- Anyone with the secret can forge valid tokens for any user
- Hard-coded secrets get committed to Git, leak through code reviews, end up in public repositories
.envkeeps the secret in a local file that is excluded from version control
Configuration with .env
- Create a
.envfile in the project root:
- Add
.envto.gitignoreso it is never committed:
- Load the file as early as possible in
app.js(before anything that readsprocess.env):
- After this call, the values are available as
process.env.JWT_SECRETandprocess.env.JWT_EXPIRES_INanywhere in the project.
Good practice: commit a
.env.examplefile with the variable names but no real values, so other developers know what to provideIn production environments (deployment platforms, CI servers), the same variables are configured through the platform’s secrets management — no
.envfile is shipped.
db.js — adding the users table
- New table created alongside
flightsandpassengersduringinitDb(). UNIQUEonusernameprevents duplicate accounts; an insert collision raises aSQLITE_CONSTRAINTerror, which the controller turns into409 Conflict.password_hashstores the bcrypt output — never the plain password.- No seeding: users are created at runtime through
POST /register.
// db.js  (only the parts that change are shown)

await db.exec(`
  CREATE TABLE IF NOT EXISTS flights ( ... );      -- unchanged
  CREATE TABLE IF NOT EXISTS passengers ( ... );   -- unchanged

  CREATE TABLE IF NOT EXISTS users (
    id INTEGER PRIMARY KEY AUTOINCREMENT,
    username TEXT UNIQUE NOT NULL,
    password_hash TEXT NOT NULL,
    created_at TEXT DEFAULT CURRENT_TIMESTAMP
  );
`);
Users model — models/usersModel.js
- Owns the SQL for the
userstable. Mirrors the pattern used byflightsModel.jsandpassengersModel.js. - Two functions on the surface:
create(username, password_hash)— insert a new user, return the new idfindByUsername(username)— return the user row, orundefined
- Exports a custom
UsernameTakenError. The model catches the SQLite-specificSQLITE_CONSTRAINTerror and re-throws it as a domain error.
async function create(username, password_hash) {
  try {
    const result = await getDb().run(
      "INSERT INTO users (username, password_hash) VALUES (?, ?)",
      [username, password_hash]
    );
    return result.lastID;
  } catch (err) {
    if (err.code === "SQLITE_CONSTRAINT") {
      throw new UsernameTakenError(username);
    }
    throw err;
  }
}
Registration endpoint — POST /register
- Lives in
controllers/authController.js. - Responsibility: create a new user account with a securely hashed password.
- Flow:
- Read
usernameandpasswordfrom the request body - Validate that both fields are present (
400if not) - Hash the password with
bcrypt(cost factor 10) - Insert the user into the
userstable - Return
201 Createdon success, or409 Conflictif the username already exists (caught from the SQLiteUNIQUEconstraint error)
- Read
- The plain password never leaves the controller; only the hash is stored.
// controllers/authController.js
const bcrypt = require("bcrypt");
const usersModel = require("../models/usersModel");

async function register(req, res) {
  try {
    const { username, password } = req.body;
    if (!username || !password) {
      return res.status(400).json({ error: "username and password required" });
    }
    const password_hash = await bcrypt.hash(password, 10);
    const id = await usersModel.create(username, password_hash);
    res.status(201).json({ id, username });
  } catch (err) {
    if (err instanceof usersModel.UsernameTakenError) {
      return res.status(409).json({ error: "username already exists" });
    }
    res.status(500).json({ error: "Server error" });
  }
}
Login endpoint — POST /login
- Lives in
controllers/authController.js. - Responsibility: verify credentials and issue a JWT.
- Flow:
- Look up the user by username
- Compare the submitted password with the stored hash using
bcrypt.compare - On success, sign a JWT containing the user’s id and username
- Return the token (and the username) in the response body
- The same
401 Unauthorizedresponse is used for unknown user and wrong password,- leaking which one failed would help attackers enumerate valid usernames.
// controllers/authController.js
const jwt = require("jsonwebtoken");

async function login(req, res) {
  try {
    const { username, password } = req.body;
    const user = await usersModel.findByUsername(username);
    if (!user) return res.status(401).json({ error: "invalid credentials" });

    const ok = await bcrypt.compare(password, user.password_hash);
    if (!ok) return res.status(401).json({ error: "invalid credentials" });

    const token = jwt.sign(
      { sub: user.id, username: user.username },
      process.env.JWT_SECRET,
      { expiresIn: process.env.JWT_EXPIRES_IN }
    );
    res.status(200).json({ token, username: user.username });
  } catch (err) {
    res.status(500).json({ error: "Server error" });
  }
}
Authentication middleware
- Lives in
middleware/authMiddleware.js. - Responsibility: verify the JWT on every protected request and attach the user identity to
req. - Express middlewares have the signature
(req, res, next):- On success they call
next()to continue the pipeline - On failure they end the response (and do not call
next)
- On success they call
- Behavior:
- Missing or malformed
Authorizationheader →401 Unauthorized - Invalid or expired token →
401 Unauthorized - Valid token → decoded claims are attached to
req.user, thennext()
- Missing or malformed
- The downstream route handler can read
req.userto know who is making the request (useful for ownership checks, audit logs).
// middleware/authMiddleware.js
const jwt = require('jsonwebtoken');

function authenticate(req, res, next) {
  const header = req.headers.authorization;
  if (!header || !header.startsWith('Bearer ')) {
    return res.status(401).json({ error: 'missing token' });
  }
  const token = header.slice(7);
  try {
    const payload = jwt.verify(token, process.env.JWT_SECRET);
    req.user = { id: payload.sub, username: payload.username };
    next();
  } catch (err) {
    return res.status(401).json({ error: 'invalid or expired token' });
  }
}

module.exports = { authenticate };
Auth routes — routes/auth.js
- Maps URLs to controller functions, no business logic.
- Mounted at the root in
app.js(app.use("/", authRouter)), so the final paths arePOST /registerandPOST /login.
Protecting routes in the Flights API
- Lives in
routes/flights.js. - The
authenticatemiddleware is attached to the routes that modify data:- Read operations (
GET) remain public - Write operations (
POST,DELETE) require a valid token
- Read operations (
- Middleware order matters:
authenticateis listed before the controller, so it runs first. If it rejects the request, the controller is never reached. - Multiple middlewares can be chained on the same route (e.g.,
authenticate, requireRole("admin"), controller.remove).
// routes/flights.js
const express = require('express');
const router = express.Router();
const controller = require('../controllers/flightsController');
const { authenticate } = require('../middleware/authMiddleware');

router.get("/",                controller.getAll);              // public
router.get("/:id/passengers",  controller.getPassengers);       // public

router.post("/",       authenticate, controller.create);        // protected
router.delete("/:id",  authenticate, controller.remove);        // protected

module.exports = router;
Wiring everything together — app.js
- Two additions to the Lecture 11
app.js:require("dotenv").config()at the very top, soprocess.env.JWT_SECRETis available before any module that reads it- Mounting the new auth router at the root, so the final paths are
POST /registerandPOST /login(not/auth/register,/auth/login)
Registration and login pages
- Two new public pages,
register.htmlandlogin.html, each with a small JS file. - Both use a standard form with
usernameandpasswordfields. - Both pages load
auth.jsso the nav reflects the current login state (already-logged-in users are sent straight to/manage.html). - On submit:
- Build a JSON body from the form values
fetch("/register", ...)orfetch("/login", ...)- Display the server’s response (success or error)
- After a successful login, the JWT and username are stored in
localStorage, and the page redirects to/manage.html.
const res = await fetch("/login", {
  method: "POST",
  headers: { "Content-Type": "application/json" },
  body: JSON.stringify({ username, password })
});
const json = await res.json();

if (res.status === 200) {
  localStorage.setItem("token", json.token);
  localStorage.setItem("username", json.username);
  window.location.href = "/manage.html";
}
Shared frontend helper — public/auth.js
- Loaded by every page in
public/. Provides:getToken(),getUsername()— read values fromlocalStoragerequireLogin()— redirect to/login.htmlif there is no tokenauthFetch(url, options)— wrapper aroundfetchthat adds theAuthorization: Bearer <token>header, and logs the user out if the server replies401logout()— clear the stored token and redirect to/login.htmlupdateAuthNav()— toggle nav links based on login state (shows Logged in as X | Logout when authenticated, Login | Register otherwise; hides protected links from logged-out visitors)
- Loaded before the page’s own script with a separate
<script>tag, so its functions are available globally.
Protecting add.html and manage.html
- Both pages already existed in Lecture 11. Three changes turn them into protected pages:
- Add a Logout link to the nav
- Load
auth.jsbefore the page’s own script - In the page’s JS, call
requireLogin()at the top,updateAuthNav()to render the nav, and replacefetchwithauthFetchon every call to a protected endpoint
add.jsusesauthFetchforPOST /flights(protected).manage.jsuses a plainfetchforGET /flights(still public) andauthFetchonly forDELETE /flights/:id(protected).- If the token is missing, the user is redirected to
/login.htmlbefore the form is shown. If the token is rejected mid-session,authFetchlogs the user out automatically.
Testing protected endpoints with Swagger UI
- Open
http://localhost:8080/api-docs— the interactive documentation generated fromopenapi.yaml. - Step 1: expand
POST /register, click Try it out, fill inusernameandpassword, click Execute. Expect201. - Step 2: expand
POST /login, send the same credentials. Expect200with a JSON body containingtoken. Copy the value oftoken. - Step 3: click the Authorize button (lock icon, top right). Paste the token in the bearerAuth field and confirm.
- Swagger UI now sends
Authorization: Bearer <token>on every subsequent request automatically.
- Swagger UI now sends
- Step 4: expand
POST /flights, fill in the body, Execute. Expect201. TryDELETE /flights/{id}as well. - Click Logout in the Authorize dialog to clear the token; protected requests now return
401.
Browser flow
- Open
/register.html→ create an account. - Open
/login.html→ log in. The page redirects to/manage.html. The nav now shows Logged in as X | Logout. - Add and delete flights normally.
- In DevTools → Application → Local Storage, confirm the JWT is stored under the key
token. - Click Logout → the nav switches back to Login | Register. Visiting
/add.htmldirectly redirects to/login.html.
Next week
- CI/CD in web applications
- Course wrap-up
Acknowledgements
- Some contents of this lecture are partially adapted from:
- Harvard CS50’s Web Programming with Python and JavaScript, licensed under CC BY-NC-SA 4.0.
- Materials from University of Washington’s CSE 154 Web Programming (used with permission).
- The Odin Project (main website code under MIT license and curriculum licensed under a CC BY-NC-SA 4.0)
- The Fundamentals of Web Application Development (Web Edition) ©2025 Nicholas D. Freeman. All rights reserved. The content is provided for educational purposes only and is not an exhaustive treatment of the subjects.
- freeCodeCamp.org © 2025 freeCodeCamp.org. All rights reserved. The content is provided for educational purposes only and is not an exhaustive treatment of the subjects.
- Node.js for Beginners by Ulises Gascón. Some contents adapted under fair educational use for instructional purposes.

Web Programming